Welcome to my transitional white kitchen in my rustic 1920’s farmhouse. Wow, that’s a mouthful. This kitchen transformation brightened our dated kitchen. The combination of traditional white cabinets with modern appliances creates a transitional style. We also mixed in rustic aspects of design and décor that we cherish in our old farmhouse. Although we believe in spending money on high-quality, we also wanted to be smart with our spending. This post gives a progress update on our kitchen remodel while also sharing how we created a high quality kitchen without spending top dollar.
*As an Amazon Associate I may earn from qualifying purchases.
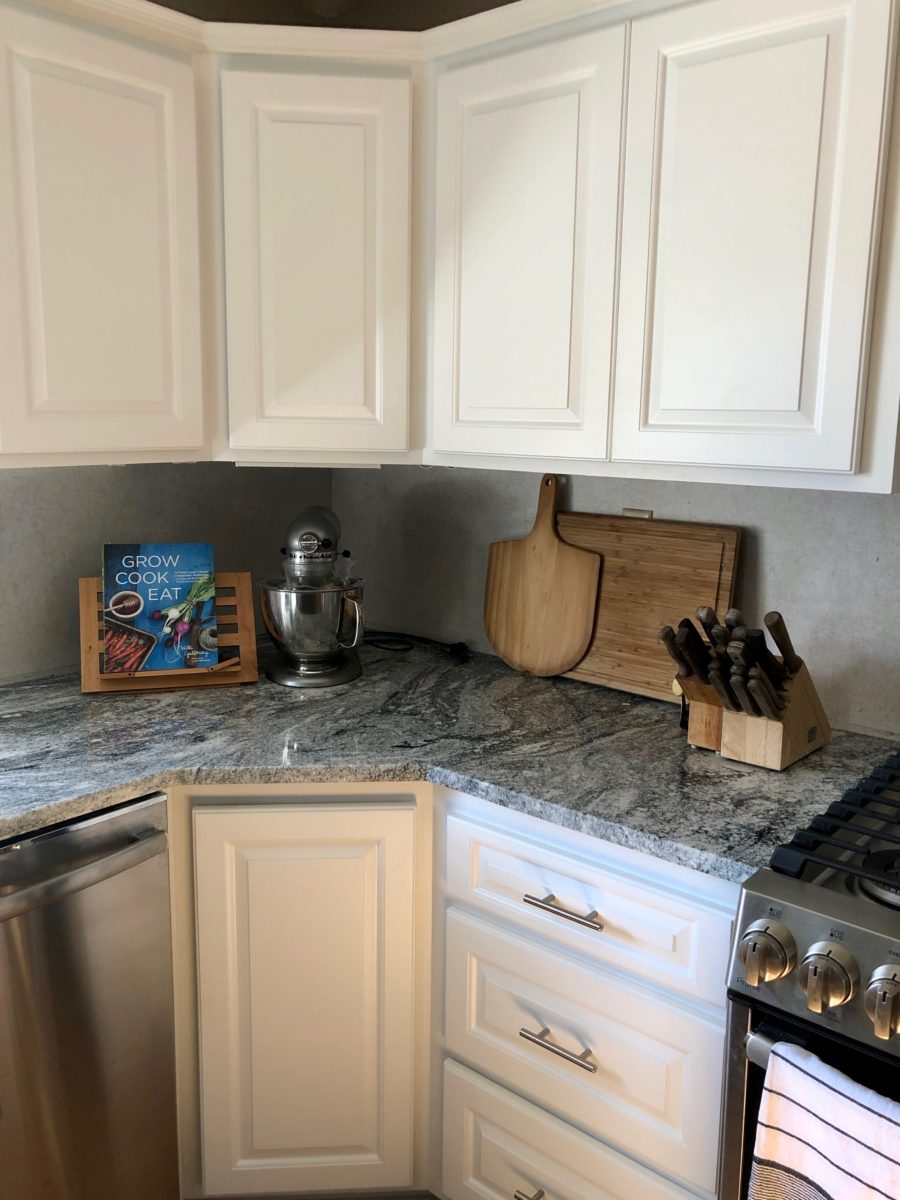
Bright White Kitchen
This white kitchen remodel has currently taken 7 months and counting. We’ve lived in the space during this time and have done almost everything ourselves while working full time. This project requires patience. Each expensive purchase was spaced out to allow time for saving the required funds. Also, each phase of the project has been completed as we’ve had the time. While our budget was a major driver for this project, resources also played a big role. Our goal was to save what we could and replace what needed to be replaced while making a maximum impact on the space.
Luckily we have a large kitchen space and could work with a good footprint. I knew early on that I would not completely replace the cabinets by removing the cabinet boxes. I initially planned on simply painting the cabinets and doors. However, the flexibility of this project allowed this plan to change as our kitchen remodel progressed. We ultimately decided to do the long process of sanding, prepping, and painting the cabinet boxes, installing new cabinet doors with hidden hinges, replacing appliances and installing new countertops. Although there is more to do (backsplash coming soon!), I am so happy with the progress.
How to paint white kitchen cabinets?
I am currently in the process of writing a very detailed post on the process of repainting and refacing these kitchen cabinets. The purpose of this post is to provide a progress report of the current status of my dream white kitchen. I did a lot of research on Pinterest to read blog posts by other people who had painted their kitchen cabinets. Although there were many quality posts, Nina Hendrick’s blog was my instruction manual for this process. She has a very detailed video and blog post that I followed to paint my kitchen cabinet boxes. She painted her cabinets (inside and outside) and doors. I only painted the exterior of my cabinet boxes but her guidance was exactly what I was looking for to walk me through the process.
Why did I choose to reface my kitchen cabinets?
I did a lot of research on how to paint kitchen cabinet doors. I choose to splurge on new doors instead of painting my existing ones for two reasons. One – I did not like our beadboard/tongue and grove style doors. I knew that painting the doors would be a lot of work. Although I felt confident that my method for painting could produce high-quality results, I knew that I didn’t like the style of the doors enough to put the effort into painting them.


The second reason I decided to reface my cabinets was that I knew that I was drawn to a specific style kitchen cabinet door. Whenever we visited a friend’s new home or when I would save pictures on Pinterest, I found that I had a preference for traditional style doors with extra detail and definition. I did significant research on various websites where I could order custom doors. These doors were either ready to be painted or some could be ordered a specific paint color. It wasn’t until I stumbled upon my dream white kitchen cabinet door on Menard’s custom order website that I felt confident in this plan.
I ordered a sample door that was custom-designed to fit my cabinet openings. I was pleasantly surprised by the quality of the doors and they exceeded my expectations. Ordering all new doors was more expensive than just painting the original doors. However, it was still significantly cheaper than replacing the entire cabinets and was a perfect combination of reusing what was existing and adding a new touch.


How to reface white kitchen cabinets?
One of the most important steps when refacing kitchen cabinets is to take measurements and to plan. I measured each existing door and drawer front. I also added additional height to the new doors because I liked the look when more of the cabinet boxes were covered. Plan and purchase your hinges before ordering your doors. If you are reusing your existing hinges take that into account as well. I did not know exactly which hinges I planned to use before ordering my doors. Because of this, I had to make some adjustments to account for the overhang and other hinge dimensions. I ultimately decided to go with a soft close hidden hinge and I am very happy with them.


We decided to reuse our existing drawer pulls and handles that we had upgraded a few years ago (not shown in the original before picture). This saved a little bit of money. They are sturdy, simple, and look great with our kitchen so there was no need to purchase anything new. We purchased these as a package set from Menards but a similar drawer handle can be found here.
How to find affordable appliances.
I replaced all of my existing appliances – fridge, stove, dishwasher (well, we didn’t have one before), sink and even microwave. I spend a lot of time in the kitchen so I knew I wanted to spend the money on quality appliances. However, I was still on a budget and wanted to make smart financial decisions. I started brainstorming ways to purchase high-end appliances while also paying less than the purchase price cost.


Since appliances are an expensive investment, I spent a lot of time researching the various options to narrow down my preferences. There are many considerations including the look and color, layout, features, etc. The first thing we did was pick a brand that we liked and then purchased all our appliances from this brand. We choose to go with GE Brand Appliances but there are lots of great options out there. I knew that I needed a gas range stove/oven. It was decided early on that I wanted an oven convection baking capabilities. I loved the idea of a large range with many burners and I ultimately decided that the layout I preferred had my controls in front but not taking up space from the range surface.
It is also important to take accurate measurements if you’re using an existing kitchen layout. We had to remove the storage above our fridge because all new fridges were taller than the available opening. Make sure to consider the space available for appliances to open and function properly.
Tip 1 – pay attention to sales
Most stores have sales often, especially on holidays. I purchased all of my appliances during some sort of sale where the prices were marked down. I would also recommend never paying the sticker price for appliances. Even if the store does not have a holiday or other type of sale going on, the price is almost always marked down from the original sticker price.
Tip 2 – search for other discount options.
I discovered that I was able to get an additional discount as an employee for my company. By utilizing this discount with a holiday sale, I purchase my fridge at a very affordable cost. Due to my prior research, I was very aware of the price offered from various stores so I could quickly assess what was the best deal during holiday sales and make my purchase.
Tip 3 – check out floor models and outlet stores
We found our stove for a fraction of its original cost by purchasing it from Sears Outlet store. Normally, I would avoid outlet stores and prefer to purchase new items. However, after doing even more research I felt confident that we would be happy with our purchase and still be eligible for various protection plans if we choose. By shopping at the outlet store, I was able to buy my dream stove that had everything on my wish list for the price of a more affordable stove that only had a few items on my wishlist.
The stove we purchased had a couple of scratches and dings. I was perfectly ok with this because it took the pressure off me when I cause the first scratch or ding (which is inevitable with the amount of time I spend in the kitchen). We did have to use the warranty that we paid for to have a part fixed on the stove. The customer service was pretty slow but they ultimately did a good job repairing it with no additional cost. Many stores have previous floor models for sale so shop those items as well.
How much do granite countertops cost?
Granite is a great option for new, quality countertops but it is more affordable than quartz. Comparatively, it is also more durable than marble. I researched many different options for refreshing my existing countertops. Some options included paint kits, butcher block, contact paper, and many more. I was looking for an affordable option. I love the look of marble but durability is very important to us. Ultimately, I decided not to go with a solution like paint or contact solution for that reason. By investing in granite countertops, we knew we would appreciate this update daily.


We ultimately decided to go with Tony’s Kitchen & Bathroom design. I stumbled across their ad on Facebook and am so happy that I did. They were affordable, professional and convenient. They came out to take multiple measurements but also allowed us to visit their warehouse where we could look at the available granite variations. Although they bring samples when they take their measurements, we enjoyed seeing what else they had to offer. As people who are always starting a new project, we may visit them again to purchase granite remnants for future projects.
What is the best faucet sink style?
We opted for a more industrial style faucet. Function is very important to us so we wanted something simple and sturdy. We shopped in quite a few different stores before finally deciding to purchase the faucet from Amazon. Opting for the Kraus Single Handle Commercial Kitchen Faucet with Dual Function Pull Down Spray Head gave us the look and function that we were wanting.
How to save costs during a kitchen remodel?
The number one way to save money during a kitchen remodel is to reuse what can be reused and to do plenty of research before purchasing anything new. By reusing what we could, we were able to keep the original charm of the house while also saving money. Research was so important during our hunt for upgrades. Patience and time allowed us to find options that we were happy with and that also fit within our budget. By following some of the suggestions above, you can make upgrades to your kitchen that are within your budget.
Be sure to check back for more kitchen updates in the future as well as a detailed post about how to paint and reface kitchen cabinets. Next up – installing a tile backsplash and finishing up the new pantry. For other home remodel projects, check out our log cabin accent wall.


